Country-Style Sourdough Bread
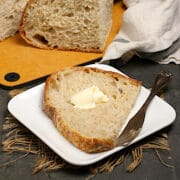
Country-Style Sourdough Bread has a crisp crust and chewy, soft crumb. This version features a round loaf baked in a cast-iron Dutch oven.
Servings: 24 slices
Calories: 78kcal
Equipment
- Dough Whisk optional: alternatively mix with your fingers
- Storage Container with Lid or bowl with lid
- Food-Safe Nitrile Gloves optional
- Bench Scraper optional, but very helpful
- Round Bread Banneton optional, but highly recommended
- Bread Lame optional, but helpful
- Wire Rack for cooling the bread
- Good bread knife for slicing the bread
Ingredients
- 375 grams warm water
- 100 grams sourdough starter
- 400 grams bread flour plus more for dusting
- 100 grams whole wheat flour
- 10 grams table salt
Instructions
- Start with sourdough starter that is active and has been fed within the past 12 to 24 hours (ideally closer to 12). A good rule of thumb is that it should be doubling in volume within 6 hours of being fed before making bread with it. It should also float in water before adding it to the recipe. If it doesn't, feed it and let it ferment for a few hours first.
- Add 375 grams warm water to a large plastic container or bowl, ideally with a lid. Vigorously whisk in 100 grams sourdough starter until the water is an even milky color.350 grams warm water, 100 grams sourdough starter
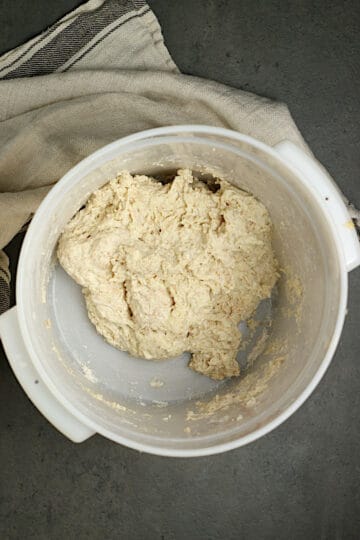
- Mix in 400 grams bread flour and 100 grams whole wheat flour and mix until all of the flour is incorporated. I find that the easiest way to do this is with my hands. The dough will be kind of scrappy-looking and not smooth at all at this point. Cover the container and let the dough rest for 25-45 minutes.400 grams bread flour, 100 grams whole wheat flour
- Sprinkle 10 grams table salt and the remaining 25 grams warm water to the dough, and mix again until the water is incorporated and you no longer feel any grains of salt.10 grams table salt, 25 grams warm water
- Cover the container again and move it to a warm spot (if your oven has a proof setting, you can use that. If not, you can use the closed oven with the light on). Let the dough rest for 30 minutes.
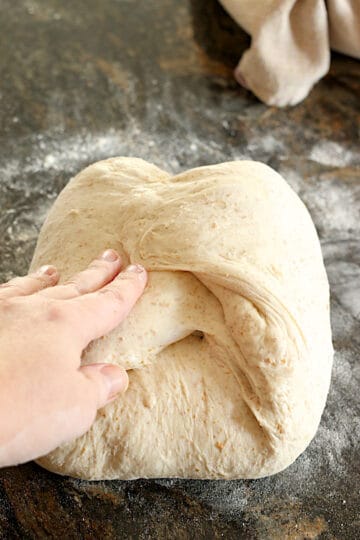
- Open the container, and with the dough still in the container, pick up the dough from one side and stretch it up, letting the weight of the remaining dough pull it down. Fold the side you were holding down to meet the opposite side of the dough. Turn the dough to pick it up from another side, and repeat this stretching a total of 8 times. Cover the dough again, and place it back in its warm spot to rest for another 30 minutes.
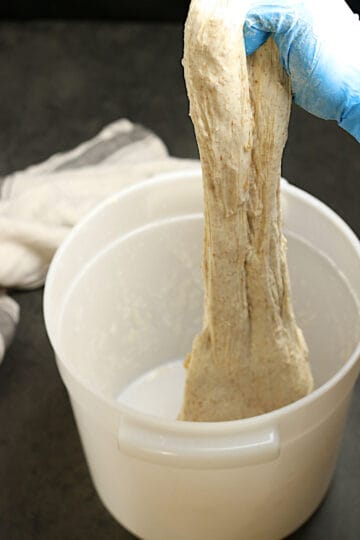
- Repeat the resting/stretching routine 3 more times (a total of 4 times in all) over a course of 2 ½ hours (so that's rest-stretch-rest-stretch-rest-stretch-rest-stretch-rest). By the end of this course, the dough should be soft and pillowy, and have increased by 20-30% in volume. If it's not, repeat the above procedure for another hour.
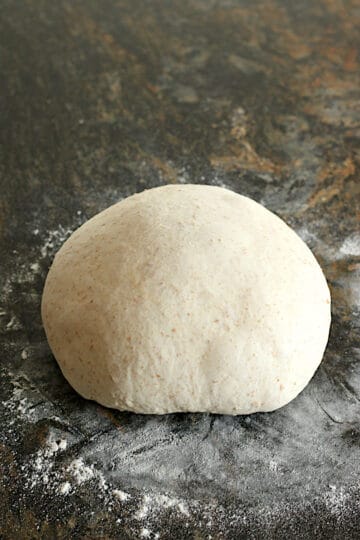
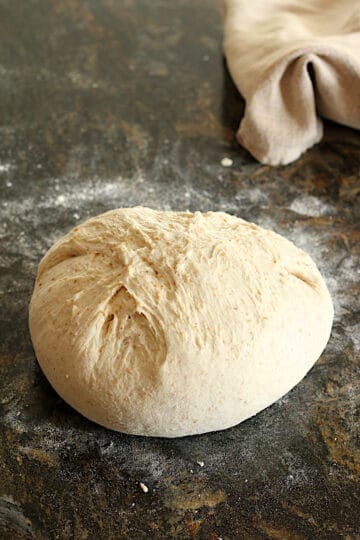
- Transfer the dough to a clean countertop and dust lightly with flour. Use a bench scraper to turn the dough so that the floured side is on the bottom. Fold the non-floured (sticky) side of the dough in so that the floured side of the dough forms the complete exterior. Form the dough into a taut round by gently cupping your hands around the dough and pulling the edges of the dough under and toward the center to form a ball. Cover the dough with a clean towel and let it rest for 30 minutes.
- Lightly dust the dough round with flour again, and flip it over so that it is flour-side-down again. Picture the dough as a clock. Pick the dough up at 12 (the side furthest from you, and fold it over and gently press it only intself about ⅔ of the way across the dough. Repeat with the remaining sides of the dough (3, 6, and 9).
- Gently pinch the loose ends together at the top to form a tight ball, gently, without squeezing too much of the air from the dough.
- Place the towel that you were using to cover the dough in a round banneton (or small-medium colander) and sprinkle it fairly generously with flour. Place the dough on the floured towel in the banneton, seam-side up. Sprinkle this side of the dough lightly with flour, then fold the towel loosely over the dough so that it is completely covered.
To Bake Today
- Return the banneton to the warm spot where it was rising earlier. Let it sit (covered in the towel) for 3-4 hours.
To Bake Tomorrow
- Place the banneton in the fridge. Leave it there overnight, or for approximately 12 hours. Remove the banneton from the fridge and let it sit in a warm spot for at least 1-2 hours before baking. The dough should return to room temperature.
- 30 minutes before you're ready to bake the bread, move an oven rack to the bottom position and place a cast-iron Dutch oven or combination cooker (it should be at least 4.5 quarts) with its lid on the rack. Heat the oven to 500°F.
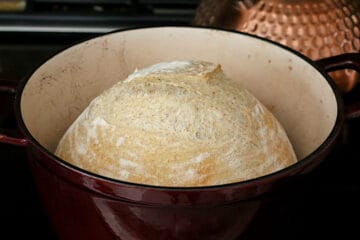
- Carefully remove the Dutch oven from the oven, and very carefully transfer the dough to the pot, seam-side down. Use a lame (or very sharp paring knife) to carefully score the top of the dough (you can do any shape you want - an X, a couple of curved lines, a square, etc.). Be careful not to bump your hand against the hot pot.
- Place the lid on the Dutch oven and return it to the oven. Immediately reduce the oven temperature to 450°F and bake for 20 minutes. At this point, the crust will be set and glossy, but pale. Remove the lid from the Dutch oven and cook for 15-20 more minutes, until the crust is golden brown.
- Remove the pot from the oven, and remove the bread from the pot (I prefer to turn the pot over and "dump" the bread onto a towel, but you could also pick it out of the pot with oven mitts). Transfer the bread to a cooling rack and cool for at least 15-20 minutes before slicing.
- Slice the bread to your desired thickness. It is best fresh, but it will still be good over the next couple of days. To keep the crust crisp, avoid placing the entire loaf in an airtight container or bag. Instead, cover only the cut side, and wrap the remaining crust in just a clean towel to prevent any dust from settling on it.
- After a couple of days, if there is still some left, I recommend slicing the remainder and transferring it to a zipper bag or airtight container to store in the freezer. Toast lightly before serving.
Nutrition
Calories: 78kcal | Carbohydrates: 16g | Protein: 3g | Fat: 0.4g | Saturated Fat: 0.1g | Polyunsaturated Fat: 0.2g | Monounsaturated Fat: 0.04g | Sodium: 163mg | Potassium: 32mg | Fiber: 1g | Sugar: 0.1g | Vitamin A: 1IU | Calcium: 4mg | Iron: 0.3mg
