Homemade Hamburger Buns
Making homemade hamburger buns is easy if you plan ahead. Your guests will be so impressed to learn your soft, fluffy buns are homemade!
It’s getting really close to hamburger season. So close I can almost taste it. There’s not much better than a homemade burger, so why not make Homemade Hamburger Buns too?
Have you ever made your own hamburger buns? It’s time to start!
The first time I made my own hamburger buns, it wasn’t even on purpose. Burgers were on the menu for dinner that night, but we didn’t have any buns. I couldn’t get to the grocery store, so I made my own.
You really can’t beat the taste of freshly baked bread. I used to beg my mom to make fresh bread in her bread machine every couple of days. It’s just so good! Now I make my own, without a machine.
These hamburger buns are a little different than regular old sandwich bread in that they have egg, butter, and sugar added to them – they are enriched.
I made these ones with all white flour, but of course, you could exchange part or all of the white flour for whole wheat, if you wish.
Like any bread, you won’t be able to make these at the last minute. They take almost 4 hours until they’re done, but that’s mostly hands-off rising time.
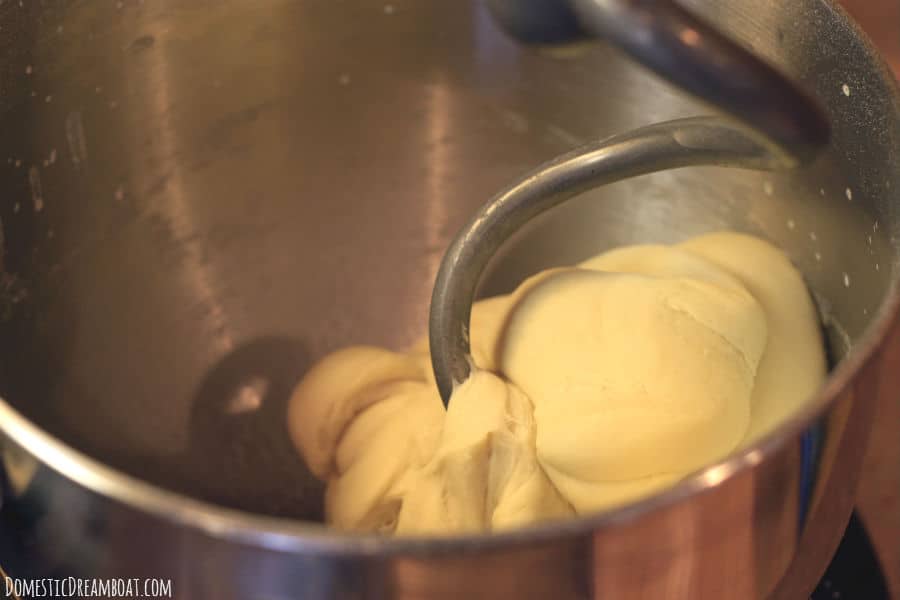
How to make Homemade Hamburger Buns
The recipe starts by adding the yeast, a little flour and warm water to a bowl to proof. You’re waiting for the yeast to start to get foamy.
Once that happens, you add the egg, butter, sugar, salt and flour and knead it all together. If you make bread (or any baked goods) a lot, consider investing in a good stand mixer. If you bake only occasionally, kneading by hand is fine too.
Then you make the dough into a ball, coat it with a little oil, cover it up and forget about it – at least for the next couple of hours…
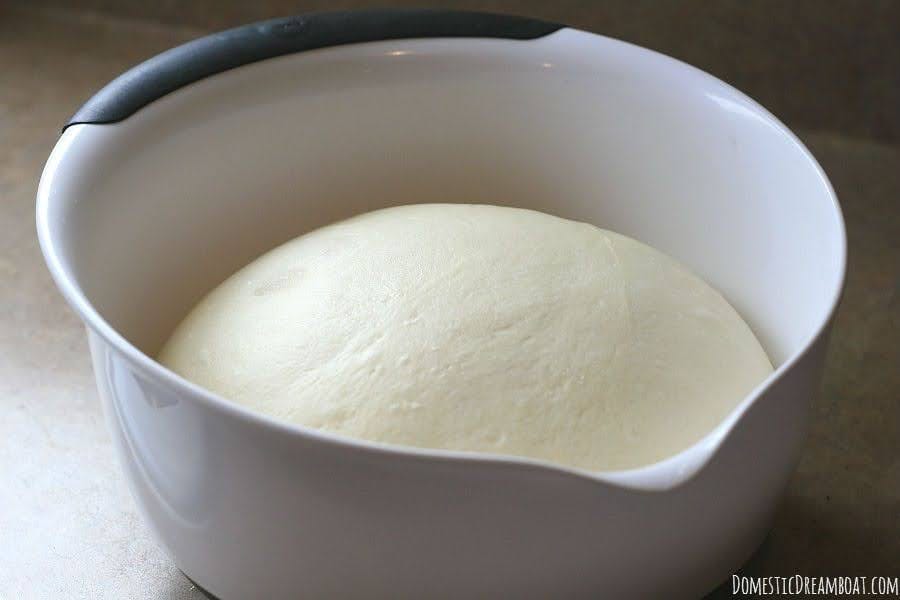
When it looks like this. The dough will have doubled in size.
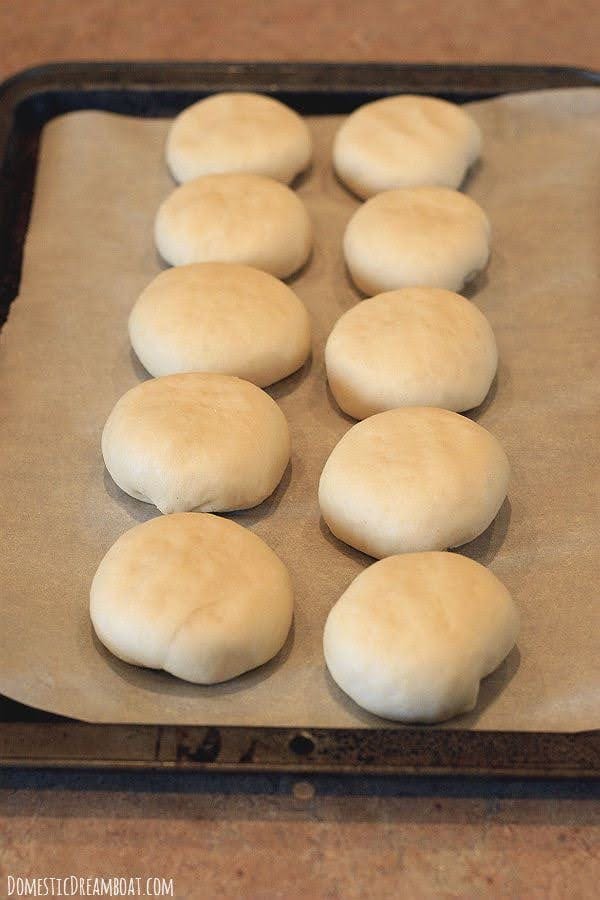
Now we need to cut the dough into bun-sized pieces. This is where you need to do a bit of thinking. What are you using the buns for?
If you’re looking for medium-sized buns, cut the dough into 10 equal pieces.
Are they for large (1/2lb) burgers? If so, only cut the dough into 8 pieces.
For small sliders, do 12-14 pieces.
Form the dough into balls, tucking the ends under the bottom. Slightly flatten the balls with the palm of you hand, and cover them back up to rise again.
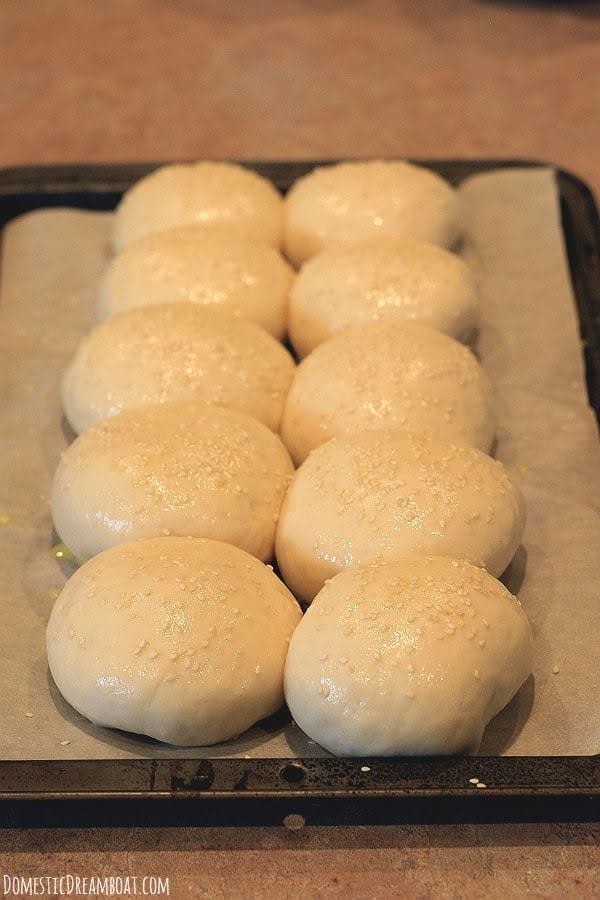
Once they’ve risen, and they start looking like real buns, you need to get them ready for baking.
This includes brushing with an egg wash, and sprinkling on some sesame seeds (or poppy seeds, or onion, or cheese, or whatever you want).
The egg wash helps them get nice and brown in the oven. Then stick them in the oven.
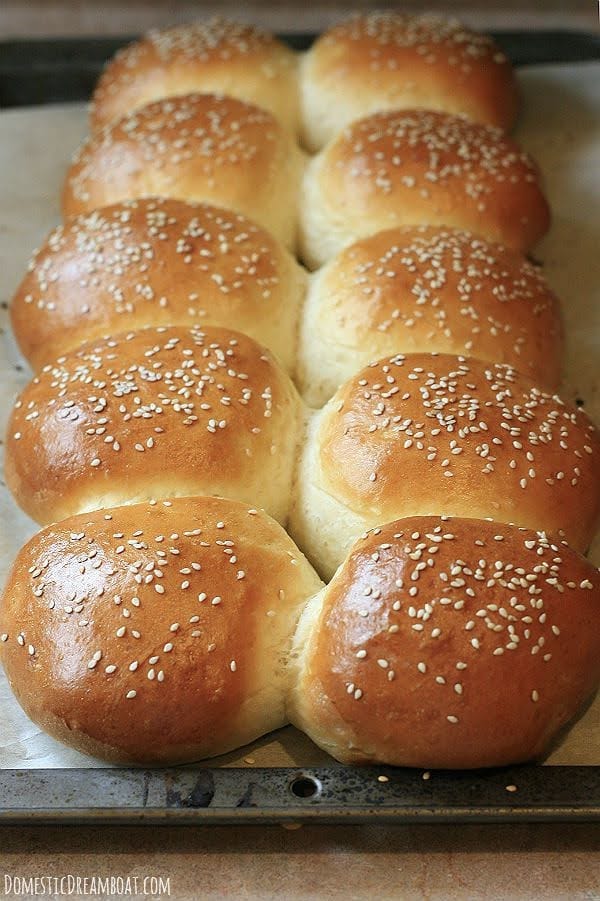
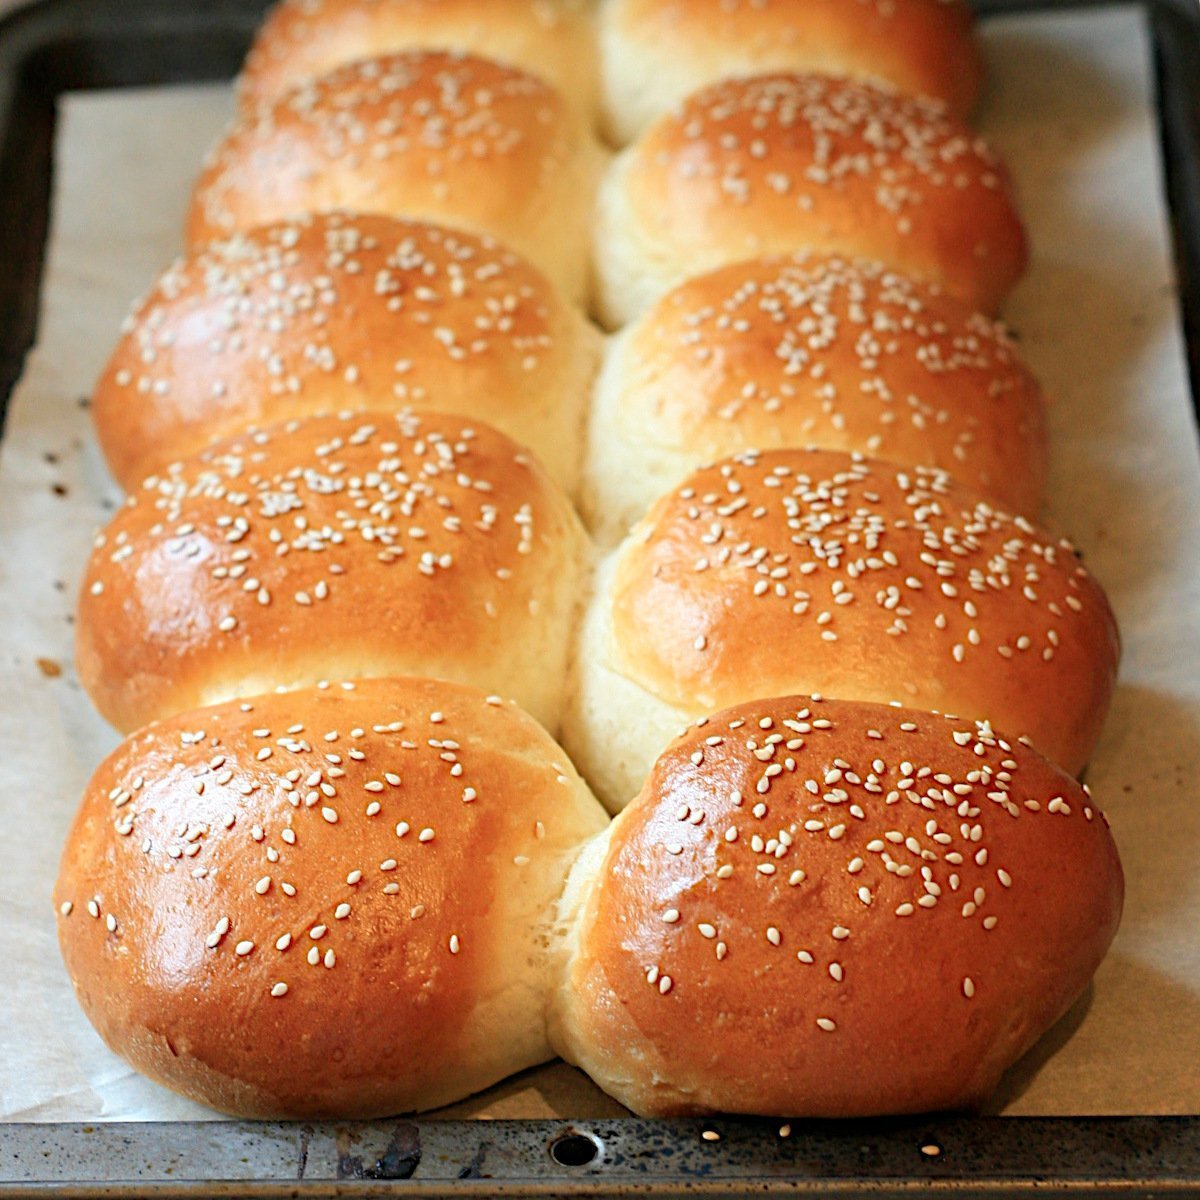
Don’t they look good? Let them cool for a bit and you’ll be ready to go.
Since these aren’t loaded with preservatives like store-bought buns, they get stale a little faster.
That means you’ll want to eat them when they’re fresh, or freeze them right away.
Don’t refrigerate fresh bread, because it makes it dry and hard. Room temp or freezer for your bread, always.
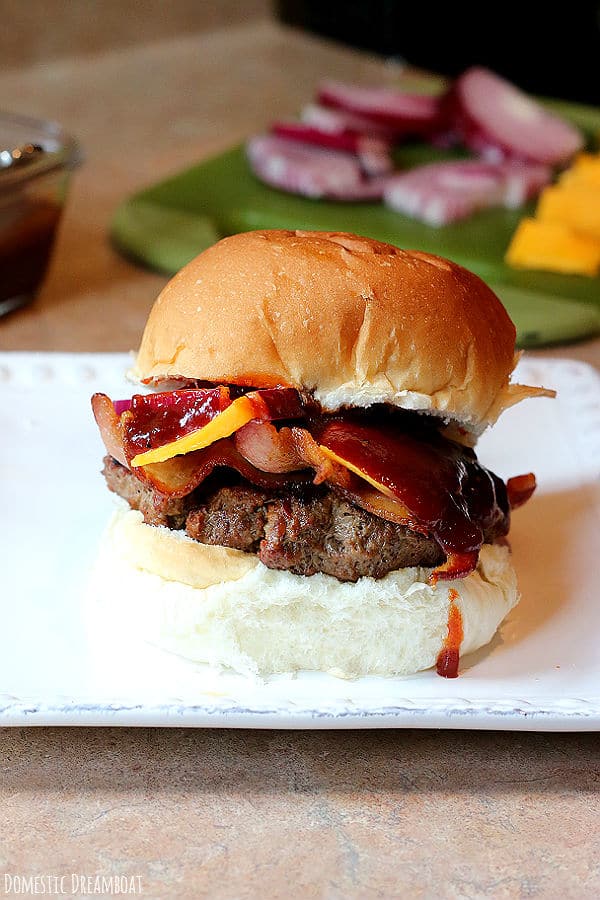
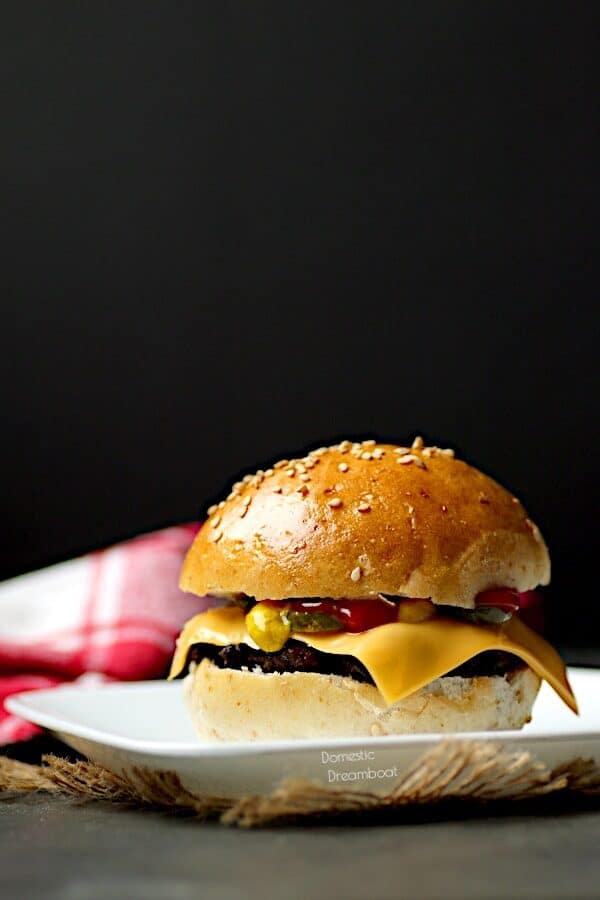
Want to know how to use these buns?
Homemade Hamburger Buns Nutrition Notes
The nutrition information in the recipe below is for one bun if you make 10 buns with the recipe. If your buns are bigger (or smaller), the nutrition information will vary accordingly.
You can replace some of the all-purpose flour with whole wheat flour to increase the fiber in these homemade hamburger buns. I’d recommend not using more than half whole wheat flour (1 1/4 cups) to avoid affecting the texture and flavor of your buns.
Ingredients
Instructions
- Stir together 2 1/4 teaspoons (11 g) active dry yeast, 1 cup (240 ml) warm water and 1/2 cup flour in the bowl of a stand mixer or a large bowl. Let sit until mixture becomes foamy, 10-15 minutes.
- Stir the 1 large egg, 3 Tablespoons melted butter, 2 Tablespoons (30 g) white sugar, and 1 teaspoon (5 g) salt into the yeast mixture. Add 2 1/2 cups of flour and knead with a dough hook in a stand mixer, or by hand until all the flour has been incorporated. If the dough remains very sticky, continue adding the remaining 1/2 cup of flour, 1 Tablespoon at a time until the dough is smooth and elastic, and just stops sticking to the bottom of the bowl (make sure all of the previous flour is incorporated before adding more).
- Form dough into a smooth ball and brush lightly with oil. Place in a lightly oiled bowl and let rise for about 2 hours, until doubled in size.
- Form dough into a log and cut into 8-14 pieces (see note). Work with 1 piece of dough at a time, and keep the remainder covered. Form each piece into a ball, tucking the ends underneath. Slightly flatten the ball with the palm of your hand. Place dough patties on a baking sheet lined with parchment paper or a silicone baking mat about 1/2" apart. Allow to rise about 1 hour, until doubled.
- Heat oven to 375°F. When buns have risen, whisk together 1 egg and 1 Tablespoon (15 ml) milk. Lightly brush the egg mixture on top of each bun, being careful not to collapse the dough (you should have quite a bit of egg wash left over). Immediately sprinkle with sesame seeds or other toppings if desired.
- Bake buns for 15-17 minutes, or until golden brown. Cool. If you aren’t going to use the buns within 2 days, freeze leftovers.
Nutrition
Video
Notes
Tried this recipe?
Please Consider Leaving a Review!


Someday, I WILL make homemade hamburger buns! These look perfect. Pinned!
Yes, it’s well worth the effort to make from scratch. Thanks!
Looks. Good
I’ve made this twice and both times they came out delicious! It’s my new go bun recipe now for sure! ❤️
Wanna try this recipe for burger bunsbASAP, THX,
I’ve been looking at this recipe for a few years… have it pinned to my board… finally tried it… was nervous, but WOW… it came out great! The only thing I did different was add a pinch of the sugar to the yeast and flour to get it blooming.
Thank you for this!
I would have added a picture but didn’t see how… but it looks almost just like yours!
Looks like a great recipe. Unsure of how much melted butter that is to be added.
My mistake! I somehow forgot to add it to my recipe. Add 3 Tbsp of melted butter. I have updated the recipe, and it is correct as written now. Thanks for letting me know.
Hi Pamela. It looks like there are 3 tablespoons of butter needed. I am about to bake it. I will post pictures if all looks good 🙂
What a great recipe! Just made these and they were perfect. Thank you!!
Glad you liked them!
I’ve been making burger buns for years in my restaurant in Thailand .although I get good reviews for my burgers, I decided I wanted a lighter bun .
Looked at your website and thought I would give your recipe a try..so pleased! They are fantastic and so easy to make
Thanks
Phil
I’m glad you like them! I hope they go over well in your restaurant!
Just made these for the first time for a BBQ we hosted. Everyone loved them even though I made them 2 days previously. They were quite easy to make so next time I’ll make them just the day before so they’ll be fresher. Delicious and I will not be buying buns again anytime soon (unless I’m feeding a super big crowd).
I’ve made things before but in your recipe you call for milk but you do not put in instructions when to add the milk you left it out there
The milk isn’t added to the dough, it’s only whisked together with the egg and brushed on top of the dough rounds just before baking in step 5. If you don’t have any milk, or don’t want to use it, simply replace with water.
I just took it out from the oven and it taste very yummy!
I don’t have any form of mixer is there a way to make this wit without it?
I’m sort of new to the whole bead making thing…
Definitely! Follow the recipe as written, but in steps 1 and 2, stir the ingredients together in a large bowl with a large spoon. Once all except about 1/2 of the flour has been added, you start kneading by hand, kneading in the remaining 1/2 cup flour as you go. Then follow the rest of the recipe as written.
You want a mixer. Kneading dough is no fun.
You’re right, but think of it as a workout 🙂
I made the buns and am having problem with the rise during baking. Live in Lapaz Bolivia and all my bread baking does not rise! Still taste wonderful.
Could your yeast be old? Once opened, it actually doesn’t last very long (maybe 6 months at the most if stored properly), and after that it begins to lose it’s ability to rise. If not, elevation could be a factor. Dough actually rises more quickly at high elevations (as I’m sure you are aware, you are at a MUCH higher elevation than I am). Could it be possible that the dough rose, and then fell? This would result in dense, heavy buns that may not appear to have risen at all.
If I were you, I’d first try new yeast, keeping a very close eye on the dough while it’s rising, not paying as much attention to the time, and punch down and shape the dough as soon as it has doubled in size, no matter when that occurs. Hope that helps! 🙂
Can olive oil be used in place of vegetable oil?
Yes, but depending on your olive oil, you might be able to taste it in the buns.
About to make these!!!
Great! Let us know how they turn out!
Hello! Just wondering about how long to knead the dough in stand mixer? Thank you! Recipe sounds easy!
I usually don’t knead very long. I’d say 5 minutes or so at the most. Enjoy!
Thank you!! Making right now!!
1 more question…after dough rises, should I turn out onto floured surface to form roll?
You certainly can, but I usually just form the rolls one at a time in the palm of my hand. In any case, a very thin layer of flour should be all that you need 🙂
As soon as my hamburger buns come out of the oven, my 2 year old son asked for it. He finished the whole bun ( medium size, like yours) and while eating he says, “yum mommy”. Glad to have found your recipe. Thanks so much, Carissa!
Your 2 year old sounds like he has a healthy appetite like mine! I’m so glad your family enjoyed them! They definitely are best when they’re fresh.
I just made these and turned out perfect! Thanks!
Great to hear! Thanks for trying them.
Besides egg wash any other things I can do to make the crust softer? I like the hamburger buns I buy at Trader Joe (their buns are soft both inside and out).
Usually adding a bit of fat to bread in the form of eggs or butter will make them softer. This recipe already takes advantage of that tactic. The only other thing I can think of is to replace the water with warm milk. I have never tried it with this particular recipe, so I don’t know how well it would work, but I highly doubt that it would do any harm. You’re right that commercial buns tend to be softer, and stay softer longer. This is likely due to preservatives and other ingredients that home cooks don’t have access to. Good luck!
I know this is an old post, but someone may benefit. To make a very soft crust, but its not shiny, brush dough with butter before and right after they come out of oven and eliminate the egg wash. You can still use sesame seeds. Another option for soft shiny crust is to use only the egg white for wash, I throw the egg yolk with the dough so I don’t waste it. Egg white makes a softer crust than a whole egg.
For hotdog buns, I replace water for milk or half water half milk and it does work beautifully for that dinner roll soft crumb. Happy baking.
I absolutely love soft sesame seed buns reminds me of the buns me and my dad bought back home. I made these and the egg wash seemed a bit too intense like it made the tops hard which is not what I was going for, however very light and fluffy inside. I’ve decided to freeze mine as I was not aware until now it wasn’t good to refrigerate fresh bread. All in all it is a good recepie I think I just have this ideal from my memories I can’t replicate 🙂 my boyfriend loves the buns I made so thank you Carissa for the great recepie I think it’s still great!
Hi, I made these buns exactly by the recipe, and they were GREAT! In order to keep the crust soft, I covered the buns with a damp cloth right after taking them out of the oven, amd kept them covered until they cooled down. Works perfectly! (I do this with all my bread).
love your buns , they look perfect , thanks for the recipe. My question is : can tI egg wash my buns before leaving them to rise ? because every time I do egg wash the buns after the rising , they deflate though i make sure to brush it lighly and not tobe hard on them . thanks.
Good question. If it was me, I probably wouldn’t put the egg wash on before rising, for food safety reasons and because the egg wash might harden on the dough and affect the buns negatively. You could just skip the egg wash all together, but you wouldn’t be able to add the sesame seeds and the finished buns wouldn’t be as shiny. It wouldn’t affect the flavor of the buns at all though.
You could put it in a spritz bottle so you could spray it on instead of having to brush it on.
It’s definitely worth a try. But because it’s a little thicker than water, it may clog the nozzle.
Thank you for the reply , you’ve been of great help . I will put all the infor mations you gave , in my mind while making the buns following your recipe .Thanks.
Can you freeze this dough? I was thinking of freezing half of them after shaping into buns before the second rise. So then I would thaw, rise, bake. Thoughts?
Hmm…I’ve never tried it. I’m not sure it would work to form them and then freeze them – I’ve just never seen it done like that. But I think it would work to freeze the dough all (or half) in a ball, then thaw, form into buns and rise. If you try it, let us know how it works!
my buns are getting hard after coming out of oven
Is it as soon as you take them out? In that case, they might be getting overcooked. Try reducing cooking time a bit (maybe by 5 minutes or so). Or does it occur later than that, say the next day? Unfortunately, that is the downfall of homemade buns. Since they don’t have preservatives in them like store bought, they don’t stay soft as long. But they should be soft right out of the oven.
Using this wonderful recipe as a template, I created burger buns with olive oil as the fat, honey as the sweetener, and a flour mixture that was 1/3 whole wheat and 2/3 white flour.
A note – I’ve read that when making a brushed egg topping, a sprinkle of salt may help to further break down the egg.
I will make the dough in the bread machine.
Wish me luck !!
Thank You for the recipe
Mary
I followed the recipe and guess What ……………………………………? It came out Nice and so tasty.Thanks Carissa
Love this recipe! I made them in the bread machine which worked out very well. Only down side is I’ve always skipped the bun when having burgers but these are so good!
I am happy)) I did it!!!
I make my own bread regularly so I know how the dough should feel prior to the first rising. It seems to me you have 1/2 a cup too much flour in the recipe. The dough is dry and very hard to knead without adding water, which I hate to do because adding water as you knead is not a good way to do it. The first time I made these, they turned out very well with the added water, but the next time–not so good.
You’re right – it’s best to make bread based on feel. Recipes for bread can vary, depending on the climate you live in or the type of flour you use. It’s possible that while my recipe works for me where I live (a fairly humid climate), if your climate is drier you may need less flour. Or the second time you tried, maybe was a particularly dry time of year? I’d recommend adding 1/2 cup less flour and see how it goes from there. If the dough is still too wet, add flour gradually (1 Tbsp at a time) until you get the right consistency. It’s easier to add flour to wet dough than to add water to dry dough. Thanks for pointing this out.
Hi Carissa,
I made the buns last night, no mixer, they where lovely. I did not however achieve the nice tan coloring you have in your picture here and got a mostly white finish, where do you think I went wrong? more egg? more milk? brush once half way through baking?
Thanks!
Hmm…I’m not sure why they wouldn’t have browned. I would hesitate to brush with more egg and/or milk as if they got too wet, they may turn out soggy. In fact, I would think having them be too wet would lead to less browning. Maybe that’s what happened?
Okay, thanks for the reply. I’ve got a batch on the first rise right now, but I don’t like what I see. Next time I will add the the flour to the liquid mixture and stop when I get the right feel for kneading. I’m determined to get this right, as the first ones I made were great–soft and fluffy and totally what I like in a hamburger bun.
I’ve made this recipe twice and it’s just delightful. Also, once cooled completely, the buns freeze perfectly.
I run a small cafe and pride myself on homemade items so making hamburger buns were essential. I love this recipe. I have modified the shaping to use for hot dog buns and this works well for those also. I make 10 dozen at a time for the weekends. Daily 2 dozen. Thanks
Wow! How great to hear that this recipe is getting so much use! Thanks for sharing!
I’m about to make these for our pulled pork sandwiches. These look incredible!
JUST made these for NC pulled pork sandwiches! They turned out great. Thanks for a wonderful recipe and adding nice little tips like how to make larger/smaller buns! Very helpful!
I forgot to mention that they taste REALLY good. I never want to buy store bought burger buns ever again! Wow!
I make these every time I make pulled pork (about once every two weeks) and they come out PERFECT. I have to double the recipe due to the amount of people, but they are still super soft and just incredible!
When making these, if I just want the dough and store it for a few weeks till ready to use… What is the beat way to store just the dough
Definitely freeze it. I would make the recipe as written until the end of the first rise. Then instead of forming it into buns, wrap the ball of dough in plastic, put it into a freezer bag and freeze. When Ready to use, thaw in the fridge, form into buns and let rise. Then bake as usual.
I’m making them for my wedding
On march 19th… Could I go ahead and make the dough and feeze up till like the 16th?
For a wedding…yikes! I’d definitely want to experiment first. Theoretically it should work, however some deeper reading I’ve done has suggested other methods to freezing, and I’m not sure what exactly the right answer is. Some say to form the dough into buns, then freeze, some say not to let it rise at all before freezing and some say to double the yeast and some say to do what I suggested in the previous comment. Since I’ve never frozen this particular recipe, I can’t give you a tried and true method. Based on the reading I’ve done, I’d most likely try the method suggested here: and divide the dough into bun-sized balls without rising, then freeze. I guess the other option is to freeze the baked buns, or make the dough up to 24 hours ahead of time and refrigerate.
PS: Congratulations on your upcoming wedding!
Just made these for the first time! Perfect recipe- I didn’t change a thing. The top was a little soft to the bite – omg so good just by themselves with butter! Forget about the burger! Ty so much for the recipe!
Hi, I’ve just put them aside aside for the second rise, but won’t be cooking for 3 hours yet, will it try still be ok, or do I need to store them in a particular way? Tia x
3 hours is definitely too long for the second rise, they will fall. You could try sticking them in the fridge, but I’m not sure what the result will be. Your best bet will definitely be to bake them ASAP.
Will bake half of them now and put half in fridge, see if it makes any difference. Thanks
These were ABSOLUTELY amazing– thank you so much for sharing.. I will never buy those “never go stale” buns again!
Whenever I have made bread, I brush the top with butter as soon as it comes out of the oven. Softens the crust, and it won’t get hard so fast
Will it work if I break the ingredients in half? I don´t have three cups of flour. Or maybe use some other kind of flour? Like chickpea or corn?
Yes, you can halve the recipe. It should work just fine – I’m pretty sure I’ve done it before with no problems.
Thank you. I loved these.
Just made these today and they are so good! Will be making burgers later and can’t wait! Held a tiny bit of flour back when doing the final mix and it still started to look a bit dry so I added a tiny amount of extra water right away. That did the trick and it mixed up fine. Ended up leaving out the probably 1/4 cup flour I had held out initially. Next time I’d probably hold back 1/2 cup to start. Didn’t have sesame seeds so I sprinkled with Maldon salt and it was really nice. Will try making into hot dog buns as another suggested as well. Thanks for a great recipe!
I just made this buns, they are amazing! I wish I could post a picture. Love them love them! Take it from an experienced baker. 😉
How do you re-warm the buns after freezing them without making them dry out?
Yes! That can be a tricky one – I’ve had the best luck with the microwave. Warm on a lower setting, like medium, and also put some liquid in with the bun(s), like a mug with a little bit of hot water in the bottom. The steam from the water will help keep them moist. But make sure not to overheat – they’ll turn into rocks for sure!
I have tried your recipe but doubled ingredients for more than the original outcome number.they were delious Thanks to u my family loves them
Hi Carrisa,
I was a bit confused about adding flour to the yeast to activate. I have always used sugar. Can you explain?
Thanks
I don’t really have a good explanation – I think it’s just one of those things that I’ve just always made this recipe this way, without really pausing to think why. When I think about it scientifically, I don’t really see any reason why using just water and sugar wouldn’t work, as that’s the method I’ve just in other recipes. I’ll try it that way next time I make these buns and see if the result is any different.
This is everything I ever dreamed of in a hamburger bun recipe. My hunt is over. I’ve made these a bunch of times now and for those that find it a bit dry – always add the last cup or so of flour in increments. Sometimes the weather and climate can affect the dough!
Trying this recipe for the first time right now and my dough is on the first rise. It’s only been one hour but it has already more than doubled in size. (Room temperature is 26 C.) Should I let it sit for another hour as per your recipe or shape it into buns now?
I went ahead and shaped the dough into buns after proofing for barely over an hour because the dough had tripled in size. The second proofing went well and I did the egg wash and sprinkled sesame seeds on top. Baking however, did not go as expected. Had my oven on 375 F but there was absolutely no colour after 15 minutes or even half an hour. Finally got a little light golden colour at 35 min but the buns had spread a bit flat and were dry because of the long baking time. Any idea what went wrong?
I’m sorry to hear your buns didn’t turn out 🙁
You definitely did the right thing by shaping the buns after a shorter time. It sounds like your dough rose quickly because of the warm temperature. Is there any chance your oven isn’t working properly? I can’t imagine why the buns didn’t brown after that length of time except that maybe your oven didn’t actually get up to 375°F. I would try an oven thermometer to see what temperatures you’re actually reaching. I’ve struggled with finicky ovens not reaching or not maintaining temperature in the past and I know how frustrating it can be.
The only other thing I can think of is possibly if there was too much egg wash covering the buns. If they were VERY wet, they would have trouble browning. When I make this recipe, I usually have quite of bit of the egg was left after brushing the tops of the buns.
After a long day at work followed by cooking dinner, I was running my fingers through Pinterest, until I came across this recipe. At first, I stared at the Photo, salivating and wondering can I actually pull this?! Then I decided to go through with it, even though it was 1030 pm, and I was already tired! Then few hours later project completed. So, it turned out veryyyy tasty 😋. Best buns ever. No more store bought, no more feeding my children yucky 🤢 preservatives!! I went to bed at 2am yet very pleased 😀. It was totally worth it. Thank you for sharing your wonderful recipe 🙏
Way too much flour. So disappointed, when I buy expensive organic flour. They were stiff and I could not form them into balls.
I’m sorry these didn’t work out for you – wasting ingredients is the worst 🙁
Is there any chance you live at a high elevation? Unfortunately baking can be affected by elevation and humidity variations. I have made this recipe many times at close to sea level, and it has worked for me every time, but it’s possible that the dough would end up being too dry (stiff) at high elevations. I think I’ll re-write the recipe instructions to add the last half cup of flour a little bit at a time to avoid adding too much – after all, it’s always easier to add more flour to correct a wet dough than to add more liquid to correct a dry dough.
I’ve tried it and it is a very good and easy recipe! Thanks a lot!
I’ve made many hamburger buns over the years, and I mean years! Today I found yours. I tried the recipe and it was the best I’ve ever experienced. It will go into my best recipes ever file!
Thanks for the kind words! I’m so glad you loved the recipe!
I rarely leave reviews… but these were so good I have to! I let them rise a bit too much when I formed them into buns so I just punched them down and let rise for 30 mins, this time it was perfect. My kids said “best buns ever”
“I let them rise a bit too much…”: I’ve definitely been there too! I’m so glad you loved the recipe! Thanks for your comment.
I’ve just been getting into baking my own buns recently using 4″ silicone baking molds and the dough setting from a bread maker. These have turned out nicely, but that egg wash certainly makes yours look tons better. I need to pick up a brush soon. I also add in a teaspoon of onion powder to the dough for extra flavor.
For mine, start to finish takes slightly less than 3 hours all told. 1.5 hours bread machine dough, 20-30 minutes for final rise, 18-20 minute bake, 30 minutes to cool. I use the dehydrate setting on my oven to rise the dough which stays about 150ºF or less if I crack the door open.
I’ve also found that butter does an unfortunate thing to bread at room temperature. Unless you have a bread warmer handy, butter hardens at room temps which means stale and dry feeling baked goods when fully cold. Using non-hardening oils keeps the bread softer, without the need for a warmer. Though, your hand molded buns do look amazing.
My dough rose well, but in the 2nd proof, because they were just sitting on a cookie sheet, they spread out and didn’t get any height. So when I baked them they were really flat. Tips? Should I have made them smaller?
A poor second rise is often an indication that the dough rose too much on the first rise. In this case, the yeast uses up all the nearby food sources and then cannot make the dough rise any more. If this happens (eg. if you get distracted and forget about your rising dough), it’s sometimes possible to let the dough rise longer the second time to get an adequate rise. If you don’t think that was the problem, did conditions change between the first and second rise (eg. in a cooler spot?)? Any chance the dough was too we or underkneaded? In this case, the dough won’t have the structure required to form round, fluffy buns.
These turned out perfect! I used half All Purpose Flour and half of a multigrain flour – they were so good!
These turned out great; I’ve made ’em several times now. One thing I’d like to ask, is whether I could get away without using the butter. Calories are a big thing with me, as I need to keep my weight down and 3 tablespoons of butter add 360 calories to the batch. What do you think?
I definitely don’t recommend cutting out the fat in this recipe. Fat plays an important role in keeping certain breads (including these hamburger buns) tender. If you skipped it, I would expect your buns to be very dry. It’s important to remember that while fat does contribute a lot of calories, it’s also an important part of our diet, and cutting out fat typically isn’t recommended anymore. But butter isn’t the healthiest fat choice, and what you can do to make these buns healthier is to use a healthier oil. Any liquid oil will work, but I like to use a flavorless oil like canola. Instead of using 3 Tablespoons of butter, use 2 Tablespoons of liquid oil (eg. 2 Tablespoons of canola oil will contribute 240kcal to this entire recipe, which means only 30kcal/bun if you make 8 buns).
Just made these and they are lovely! I threw in some caramelized onion and did an overnight bulk ferment in the fridge. Beautiful flavour and texture.
Best batch of hamburger buns I’ve turned out. Light and tender; maybe a little on the sweet side, but they turned out so well I don’t want to meddle with the recipe. Definitely a keeper.
Have you made any into hot dog style buns? Wondering how long to bake for that shape. Thanks in advance.
Yes, I have used this recipe to make hot dog buns. My shaping was not up to par, and they were about the ugliest hot dog buns you’ve ever seen!
They don’t require a significant change to baking time, unless you’re making them significantly larger or smaller than average.
Second post from me about this recipe … it also makes top-notch cinnamon rolls. After the first rise, divide it in half, roll out to about 12×12-inch, sprinkle with cinnamon sugar, roll up and seal, cut in 1-inch slices, lay on a lightly oiled cookie sheet, let rise to doubled, bake as in the recipe, drizzle with confectioner’s sugar frosting.
What a delicious quarantine project! Also makes great monkey bread!
Im making hamburger and hot dog buns with this recipe in the morning. The only flour I have is Bread flour. How do I adjust the recipe? My family is so excited about having buns.
When using bread flour instead of all purpose flour, you don’t need to make any adjustments. Simply substitute 1:1. The difference is that bread flour has a higher protein (gluten) content, and will make bread and pizza crust chewier. I doubt you will notice a significant difference in this recipe though. Enjoy baking with your family!
This is the first time I have made Homemade Hamgurger Buns. Your Recipe says 1 Tablespoon of Milk. I read and re-read your recipe and I don’t see anywhere to add the milk. So I was reading your responses of how great your recipe is and what other people added or not added to your recipe, regarding brushing the top of the dough with egg white, or milk. So is your recipe that calls for 1 Tablespoon of milk, is that to brush at the top of the hamgurger buns, before baking? I have until 3:00PM for the dough to rise and it has risen well already. 🙂 Hope to hear from you. 🙂 Thank you!
Hi Susan,
The milk is used in step 5. Whisk it together with the egg and gently brush on the tops of the buns after rising, just before you bake. Happy baking! 🙂
I got the dough into individual hamburger buns! They are rising really good, and soon they will be ready to put in the oven! I will mix the 1 Tablespoon of Milk with egg wash. 🙂
We had wmoked pork that pulls apart and the Homemade Hambugrer Buns! It was the first time I had ever made homemade hamburger buns, and they are excellent! My family loved the Homemade Hamburger Buns! Thanks for your recipe!! 🙂
Not only did this recipe turn out wonderful, the measurements were spot on and I didn’t have to add the additional flour. I bagged them once they cooled and used next day and they were delicious with bbq chicken sandwiches. I saved the left over milk and egg wash for the next morning and used 1 leftover bun for my daughters breakfast (french toast) and it was INCREDIBLE. She and I both devoured our half and made me wish I had more left over. bookmarked the recipe, this is a keeper!
Hey please can u tell me why the risen buns deflate so quickly?! By the time I take them out to put on the egg wash and to preheat the oven they deflate! Would appreciate some advice thanks!
Usually when bread deflates after rising, it’s due to over-rising, which can happen because the dough was left to rise for too long, or the temperature was too warm (or both). In warmer environments, the dough needs less rise time. You mention taking the buns out of somewhere. How warm was it where they were rising? If the temperature was much warmer than a warm room temperature, I’m guessing the rise time was too long for where they were kept. Rise times listed in recipes are usually a rough guideline, since ambient temperatures vary. It is always better to use visual cues from your dough to guide you on rise time (eg. let the dough double in size) vs. strictly following the times listed. I know my dough always rises much more quickly in the summer when it’s hot and humid than in the winter when it’s much cooler. I hope that helps!
Hi!
These look absolutely fantastic and will try them later this week. I only have fresh yeast though (any sort of instant yeast seems to be sold out in literally ALL the shops I went so I bought the fresh kind). Do you think this will work as well? Do you have any idea how much grams 1 envelope of your yeast is? Several sources on the internet say I have to triple that amount when using fresh yeast.
Thanks!
Stefanie
Hello! I have never baked with fresh yeast myself, but I don’t see why it wouldn’t work. One envelope of yeast contains 0.25oz (7g) of yeast. According to Cook’s Illustrated, you should approximately double the amount of yeast you’re using (by weight) if you’re using fresh. This would mean you would need to use 14g or 0.5oz. I believe the process for fresh yeast is the same as active dry, in which case you need to proof it in warm water before mixing into the dough, just like in this recipe. I’d love to hear how they turn out for you!
Made tonight with leftover Asado Puerco. Yummo!!! Not as hard as you think. Soft but good structure. Tasty too.
I make a lot of homemade bread (English muffins, sandwich bread, flatbread, rolls, etc), but I’d never tried my hand at hamburger buns. Made this recipe today for my husband’s birthday dinner and they were PERFECT. Even after all the breads I’ve made, I was so surprised and thrilled at how great these turned out. Thank you for the wonderful recipe! One more thing I can make for myself instead of buying less nutritious options at the store! 🙂
Really great recipe. I’ve made several recipies for buns in the past but these were better. I made these buns today for hamburgers tonight. I made 10 and they were the perfect size. The rest will go in the freezer for next time. Delicious!
Just made these and I will never buy burger buns again. So fluffy and flavourful! My husband ate his burger and then ate another bun by itself afterward because he was so impressed. Adjustments I made: used olive oil instead of butter (I avoid dairy) and i used a little bit of egg white from a carton with some sesame seeds for the wash/topping part. Next time I’ll try an ‘everything spice’ mix for the topping because I think it will make them perfect. Thanks for the recipe, it will be a permanent addition to my recipe book. 🙂
Just made these and they were amazing!!! My children loves them!
Left a review on Pinterest but thought I’d add here too! DO IT! Amazingly easy (by hand!) “set it and forget it” recipe. I’ve always had trouble with proofing, but had no issues with this at all. Never did flour in the original yeast mixture before (usually just yeast, sugar or honey, and warm water), so maybe that’s the trick? I don’t know but don’t care! The family tore these apart as prosciutto sandwiches and even plain w/ marmalade, honey or whatever else we had! Did an egg white and milk wash and butter after done to achieve the color here.
My house smells amazing and I will definitely be making these agin and sharing with as many people as I can. Such a great recipe thank you for sharing it
I was looking for a recipe for hamburger buns. After trying 3 or 4, I stumbled upon this one and fell in love. They’re perfect. Airy, tasty and worth it. Doesn’t take a lot and I enjoy being able to make a few vs 8. Thanks!! Def a keeper.
This is the best bun recipe ever! I have made some that turned out heavy and yeasty. These are light and fluffy and taste amazing! I made up to the first rise in my bread machine and then added in a little more of that extra 1/2 cup of flour when I formed the buns. Thank you!
Best homemade buns. They came out perfect. I am not an avid baker but these buns made me look like one. Thank you for the recipe.
First time baking buns! WOW I am never looking back! Thank you! I used a silicon pand made for buns that I found ion Amazon. It makes 8 buns and your recipe was a perfect match. They dough weighed about 3.1 ounce each and made tall beautiful buns.
Excellent recipe I added sugar to first stage and they need more room between them on the tray