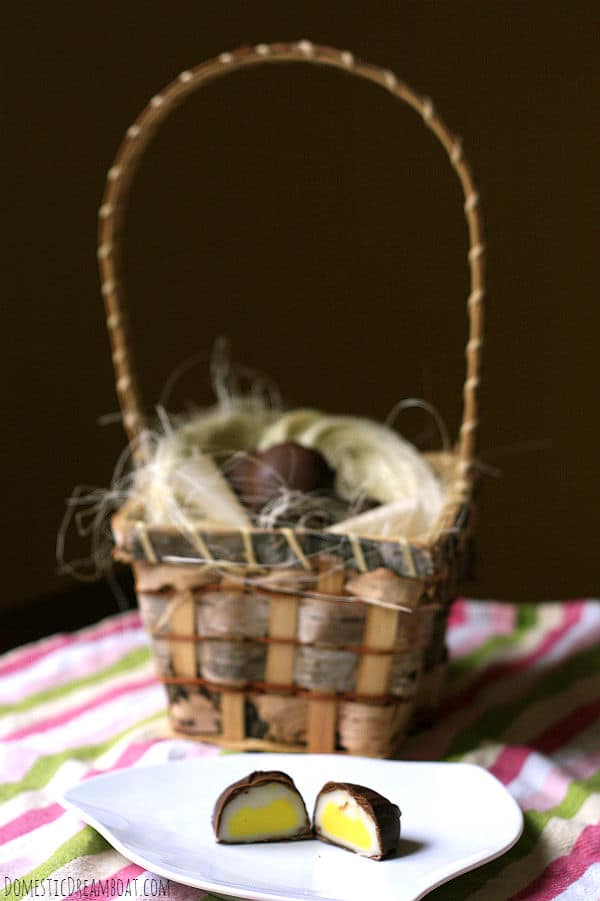
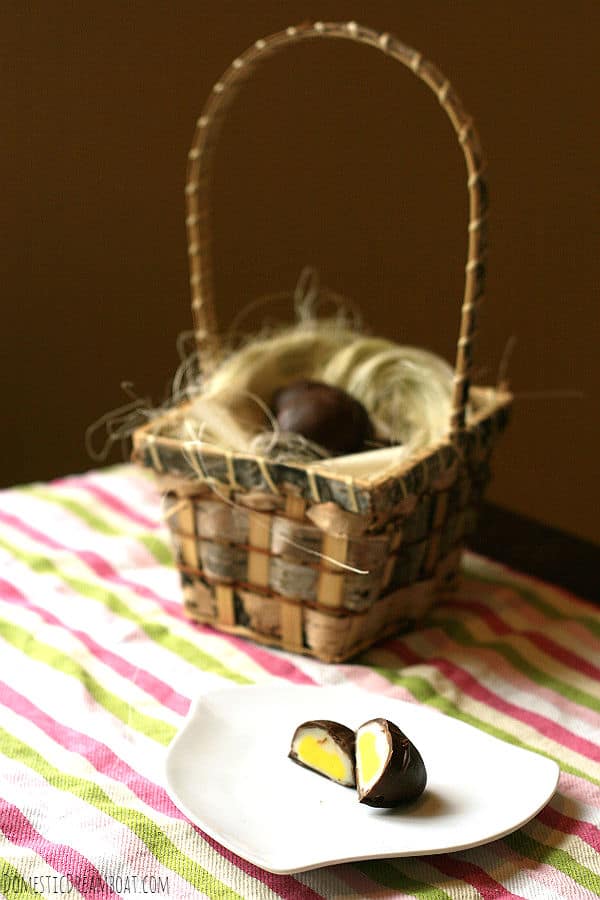
Making DIY Creme Eggs is way easier than you think. Plus, they taste just like the classic Easter treat, and are gluten-free.
Cadbury's Creme Eggs are one of those things that you either love or hate. Which side are you on?
I myself do enjoy them, but since they're so sweet, I can only handle eating about one per year. But if you're firmly in the "love them" camp, maybe so much so that you'd want to eat them all year round, I have good news for you. You can make them yourself.
I never would have thought it possible to make my own creme eggs. I mean, how do you get the yellow and the white oozy filling into the chocolate shell? Well, it turns out, it is possible, and it's not even that hard!
Now I will admit, these don't turn out EXACTLY the same as store-bought creme eggs. For one thing, they aren't perfectly egg-shaped: the bottom ends up flat where you set it down on the tray.
Also, the filling is a little firmer. It does melt when it starts to warm up though. Lastly, the chocolate shell is a little thinner, but you could make it thicker by dipping the egg in the chocolate several times.
Even so, they are a pretty darn good homemade approximation of your favorite sweet, gooey Easter treat.
How to Make DIY Creme Eggs:

The first step to making your own creme eggs is to make the filling, which consists of corn syrup, icing sugar, butter, and vanilla. The taste and texture of this filling is going to be similar to frosting.
Separate a little bit of this filling out to add yellow food coloring to, to represent the yolks.
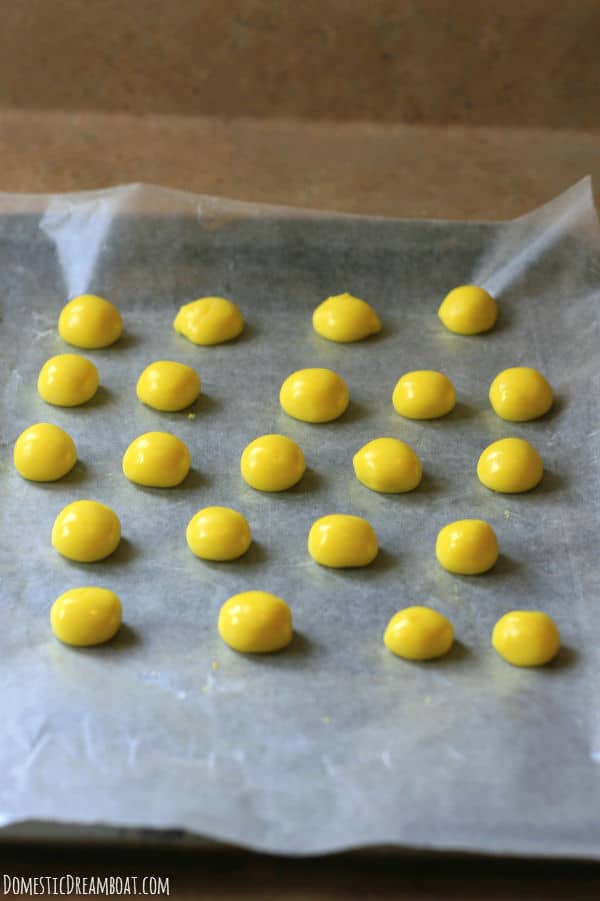
After letting the yellow portion chill for a bit, you roll it into balls to form the yolks. I thought the filling would be super sticky and horrible to work with, but actually, once it chills for a bit, it firms right up and is super easy to roll with your hands.
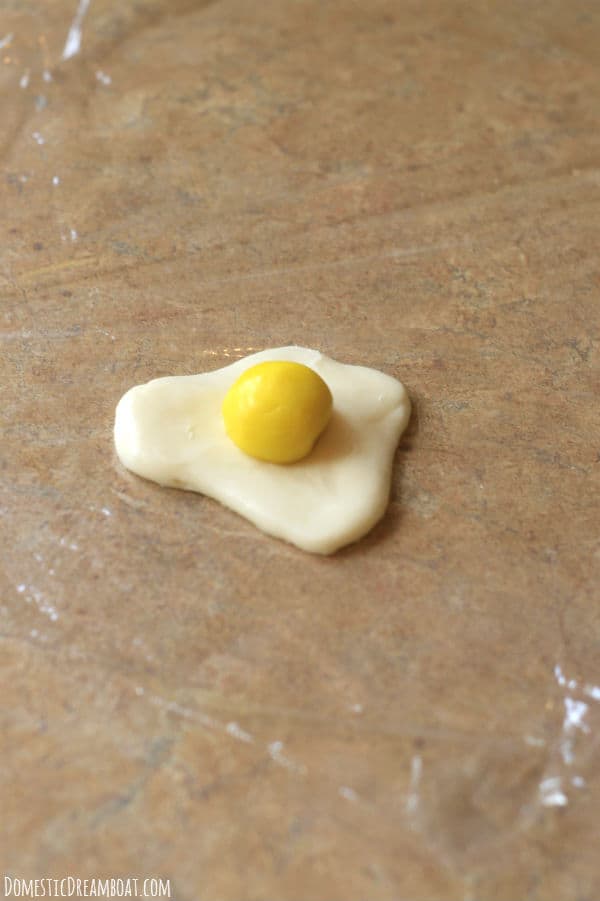
Now for the egg white: make flat patties with pieces of the white filling. Then put a yolk inside the patty and wrap the white to surround the yolk.
Now shape the whole thing into an egg shape. If at any time your filling gets too soft or sticky to work with, just stick it back into the fridge for a few minutes.
Now for the chocolate coating. This will be exactly the same as the coating you made for the chocolate covered peanut butter eggs. Just chocolate and a bit of coconut oil melted over a double boiler.
Store-bought creme eggs are dipped in milk chocolate, but dark chocolate helps to offset the very sweet filling. Use whichever chocolate you prefer. Set the coated eggs on a baking sheet lined with wax paper.
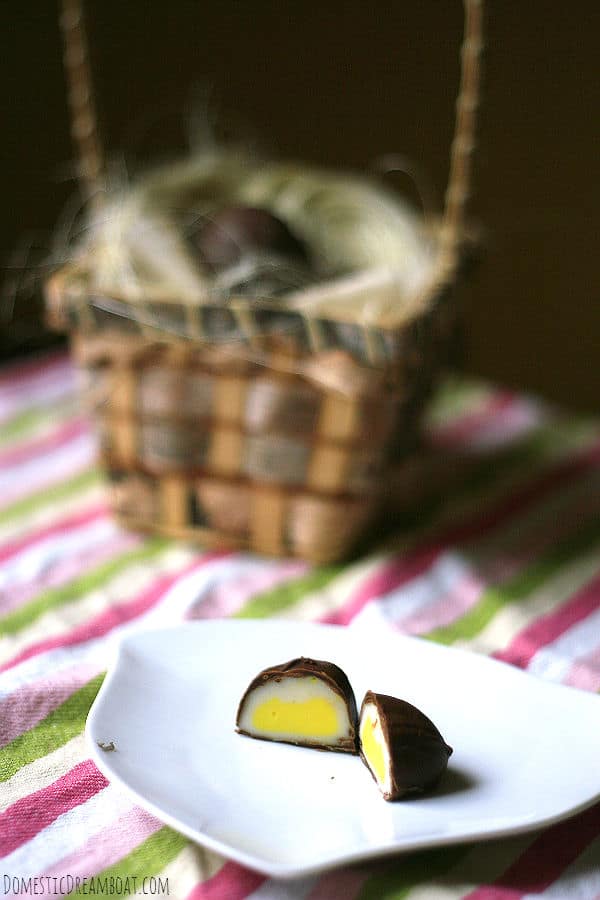
If you have chocolate left after coating all the eggs, feel free to double-coat your eggs for a thicker chocolate shell. Move the dipped eggs to the fridge or freezer to set. Once the chocolate is hardened, trim any excess chocolate with a paring knife.
Store your delicious homemade creme eggs in your freezer and you will have a supply for the whole year (or at least until Summer)!
DIY Creme Eggs Ingredients:
- Light corn syrup - make sure not to use golden corn syrup here or your white filling will have a brownish tinge to it.
- Salted butter - or use unsalted butter and add a pinch of salt
- Powdered sugar
- Vanilla extract
- Yellow food coloring - I use Wilton Color Gel
- Chocolate - choose either milk chocolate or dark chocolate to suit your preferences
- Coconut oil - or use vegetable shortening
Homemade Creme Eggs
Ingredients
For the filling
- ½ cup light corn syrup
- ¼ cup salted butter softened
- 3 cups powdered sugar
- 1 teaspoon vanilla
- Yellow food coloring
For the chocolate coating
- 12 oz chocolate
- 1 tablespoon coconut oil
Instructions
For the filling
- Cream corn syrup and butter together using a stand mixer or hand mixer. Slowly add icing sugar with mixer on low speed and mix until fully combined. Add vanilla.
- Transfer about ⅓ of the mixture into a small bowl and add yellow food coloring to make the yolks. Allow both white and yellow fillings to chill in the fridge for 15-20 minutes.
- Remove yellow filling from fridge. Pull off small pieces (about 1 tsp) and roll into balls. Place on a tray lined with wax paper and put them back in the fridge.
- Remove white filling from fridge. Pull off larger pieces (about 1 Tbsp) and flatten into round patties. Place a yellow ball in the center of each patty and wrap the patty around the yellow ball. Form each piece of filling into an egg shape, re-chilling if it becomes to soft and sticky to work with. Place the tray of egg shapes into the fridge to re-harden.
For the chocolate coating
- Melt chocolate and coconut oil using a double boiler or glass bowl set over a pot of gently simmering water. Dip each egg shape into the melted chocolate using a spoon or fork. Shake off excess chocolate and set on a tray lined with wax paper. Allow the chocolate to set in fridge of freezer. If you have any additional melted chocolate left after coating all eggs, feel free to re-dip some or all of the eggs for a thicker chocolate shell, if you wish.














Leave a Reply